Difference between revisions of "Blog/Boost document findability with tags in O365"
| Line 99: | Line 99: | ||
<div class="row funktionen-row"> | <div class="row funktionen-row"> | ||
<!-- --><div class="col-md-6 col-md-border funktionen" style="text-align: justify; "> | <!-- --><div class="col-md-6 col-md-border funktionen" style="text-align: justify; "> | ||
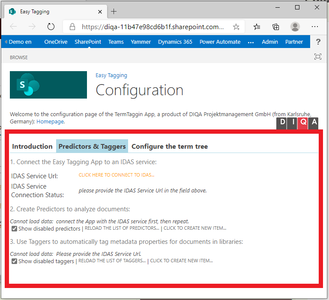
| − | === 6. Connect the Easy Tagging App with the IDAS service === | + | === 6. Connect the Easy Tagging App with the IDAS service (1/2) === |
# In the configuration page of the Easy Tagging App: click on the "Predictors & Taggers" tab | # In the configuration page of the Easy Tagging App: click on the "Predictors & Taggers" tab | ||
# Click on the link "Click here to connect to IDAS" | # Click on the link "Click here to connect to IDAS" | ||
| Line 105: | Line 105: | ||
<!-- --><div class="col-md-6 col-md-border funktionen imageExpand" style="text-align: justify; >[[File:Apptab.png|x300px|center|middle]]</div> | <!-- --><div class="col-md-6 col-md-border funktionen imageExpand" style="text-align: justify; >[[File:Apptab.png|x300px|center|middle]]</div> | ||
</div> | </div> | ||
| + | |||
<div class="row funktionen-row"> | <div class="row funktionen-row"> | ||
<!-- --><div class="col-md-6 col-md-border funktionen" style="text-align: justify; "> | <!-- --><div class="col-md-6 col-md-border funktionen" style="text-align: justify; "> | ||
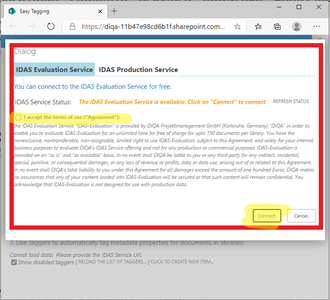
| − | === | + | === 6. Connect the Easy Tagging App with the IDAS service (2/2) === |
| − | + | # In the connection dialog: select the "IDAS Evaluation Service" tab | |
| + | # Click on "I accept the terms of use" tick box | ||
| + | # If the service status says "IDAS evaluation service is available", then click on the "connect" button. If the status says something different: click on "refresh status". | ||
| + | # The dialog closes and you can setup a predictor. | ||
<!-- --></div> | <!-- --></div> | ||
| − | <!-- --><div class="col-md-6 col-md-border funktionen imageExpand" style="text-align: justify; >[[File: | + | <!-- --><div class="col-md-6 col-md-border funktionen imageExpand" style="text-align: justify; >[[File:Connect2.png|x300px|center|middle]]</div> |
| + | </div> | ||
| + | <div class="row funktionen-row"> | ||
| + | <!-- --><div class="col-md-6 col-md-border funktionen" style="text-align: justify; "> | ||
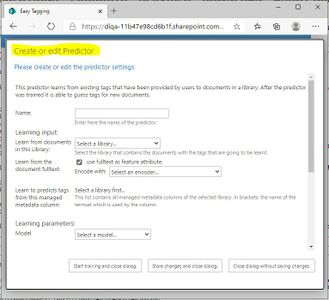
| + | === 7. Create a "Learn Tags" perdictor and let it learn from your examples === | ||
| + | # After you have created a connection to the IDAS Evaluation service you can setup a predictor which learns to tag documents from your examples. | ||
| + | # In the (now empty) list of predictors click on the link: "Click to create new item". | ||
| + | # In the selection dialog, select the "Learn Tags" predictor. | ||
| + | # The configuration form for the new "Learn Tags" predictor opens. | ||
| + | # Enter the name of the predictor, e.g. "Document types" | ||
| + | # In the field "Learn from documents in this library": select the library that contains your documents. | ||
| + | # In the field "Encode with": select the entry "Glove English subset 100k words". | ||
| + | # In the field "Learn to predict tags from this managed metadata column": select the "document types" column that you created in the earlier steps | ||
| + | # In the field "model": select "Simple CNN model" | ||
| + | # Keep the default values of the subsequent fields. | ||
| + | # Click on "Start training" to initiate the training process. | ||
| + | # You can inspect the progress of the training process in the status bar of the predictor. | ||
| + | <!-- --></div> | ||
| + | <!-- --><div class="col-md-6 col-md-border funktionen imageExpand" style="text-align: justify; >[[File:Create_predictor.JPG|x300px|center|middle]]</div> | ||
</div> | </div> | ||
<div class="row funktionen-row"> | <div class="row funktionen-row"> | ||
Revision as of 13:50, 29 September 2020
O365: Boost document findability with tags (September 1, 2020)
Finding documents in Sharepoint online/Office 365 can be tedious. If you want to restrict your search to certain document types (like: reports, inquiries, CVs, sales orders, invoices) you either end up with too many irrelevant search hits or relevant documents don't show up because they don't include the search term. If you rely on Sharepoint's fulltext search capabilities only, then your users will be frustrated and spend too much time to find the right documents.
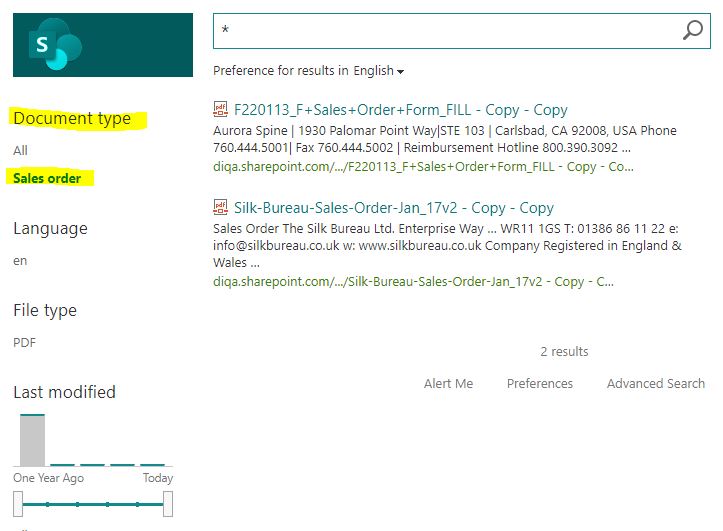
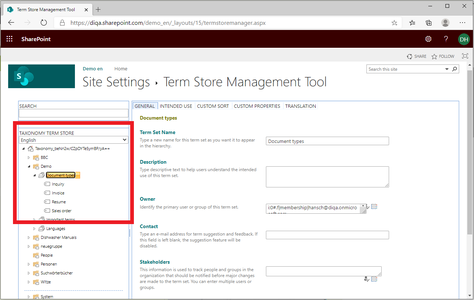
You can provide your users with a better search experience if you use search refiners. Users can further refine their search result by clicking on the refiner values, e.g. to retrieve "sales orders" or "invoices", only. Before you are able to create meaningful search refiners, you have to arrange for a couple of pre-requisites which include tagging documents with tags. This guide shows you how to automatically tag documents with their type (e.g. invoice, sales order, cv, inquiry) and how to provide search refiners that contain these document types.
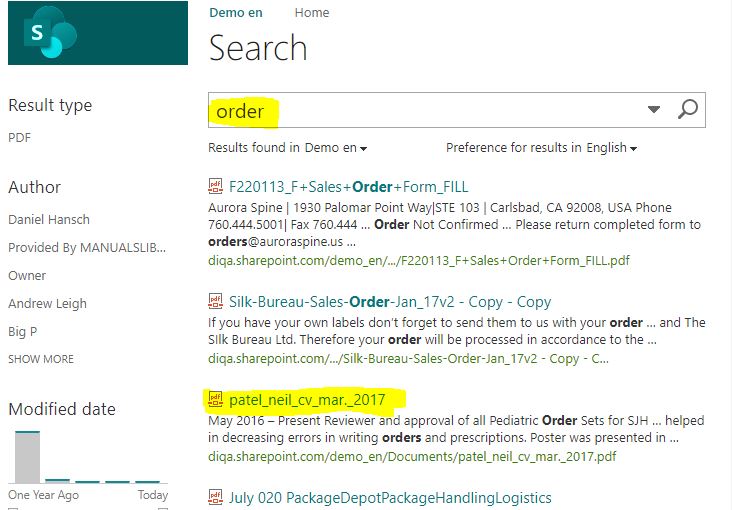
Frustrating search experience without meaningful refiners:
Entering the search term "order" returns a lot of irrelevant documents (e.g. a CV) and even misses some sales order documents.
