Difference between revisions of "Blog/Boost document findability with tags in O365"
| (6 intermediate revisions by the same user not shown) | |||
| Line 1: | Line 1: | ||
{{BlogHeader | {{BlogHeader | ||
| − | |Titel=O365: Boost document findability with | + | |Titel=O365: Boost document findability with autotagging |
|News image=File:EasyTaggingText.png | |News image=File:EasyTaggingText.png | ||
|Publication date=2020/09/01 | |Publication date=2020/09/01 | ||
|Published=1 | |Published=1 | ||
| − | |Keywords= | + | |Keywords=sharepoint, office 365, o365 |
| − | |SEO-Description= | + | |SEO-Description=Automatic document tagging boosts your document findability? ⇒reade more! |
| − | |Description=Finding documents in Sharepoint online/Office 365 can be tedious | + | |Description=Finding documents in Sharepoint online/Office 365 can be tedious. If you want to restrict your search to certain document types (like: reports, inquiries, CVs, sales orders, invoices) you either end up with too many irrelevant search hits or relevant documents don't show up because they don't include the search term. If you rely on Sharepoint's fulltext search capabilities only, then your users will be frustrated and spend too much time to find the right documents. |
|en_link= | |en_link= | ||
|de_link= | |de_link= | ||
| Line 39: | Line 39: | ||
<p> | <p> | ||
The following steps assume that you have Sharepoint Online/Office 365 and a library that contains at least dozens of documents or scanned documents (pdf or image formats). If you are familiar with certain configuration aspects of Sharepoint then you will need 30 minutes to go them through in your tenant. If you require assistance then we are happy to help!</p> | The following steps assume that you have Sharepoint Online/Office 365 and a library that contains at least dozens of documents or scanned documents (pdf or image formats). If you are familiar with certain configuration aspects of Sharepoint then you will need 30 minutes to go them through in your tenant. If you require assistance then we are happy to help!</p> | ||
| + | |||
| + | |||
| + | == Watch the steps in the video: == | ||
| + | <div> | ||
| + | <p> | ||
| + | {{#widget:YouTube | ||
| + | |id=hMaEIa2DMNs | ||
| + | }} | ||
| + | </p> | ||
| + | </div> | ||
<div id="accordionwrapper" width="100%" style=""> | <div id="accordionwrapper" width="100%" style=""> | ||
| Line 131: | Line 141: | ||
<div class="row funktionen-row"> | <div class="row funktionen-row"> | ||
<!-- --><div class="col-md-6 col-md-border funktionen" style="text-align: justify; "> | <!-- --><div class="col-md-6 col-md-border funktionen" style="text-align: justify; "> | ||
| − | === 5. | + | === 5. Launch the "Learning Wizard" in your library === |
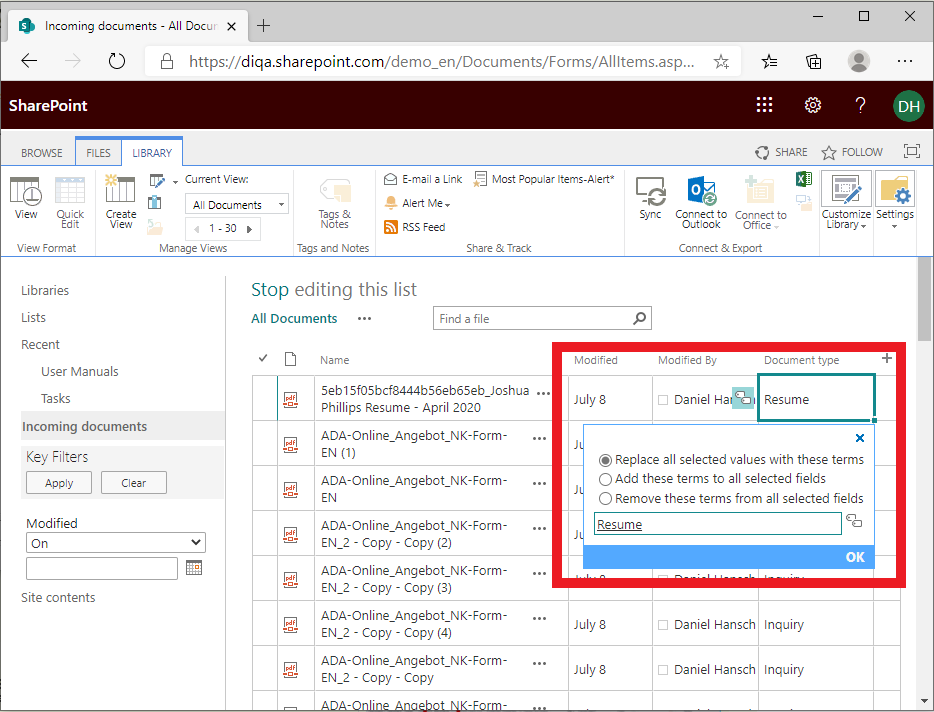
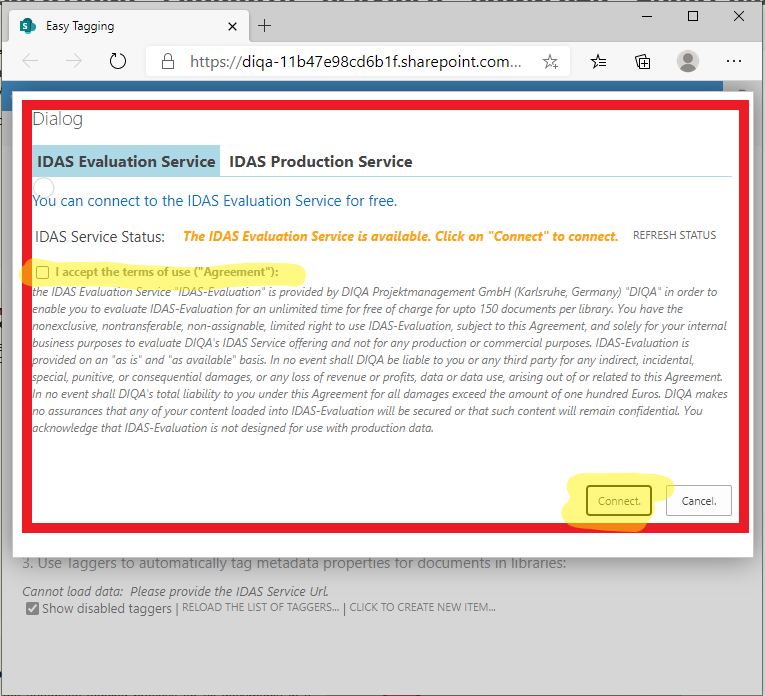
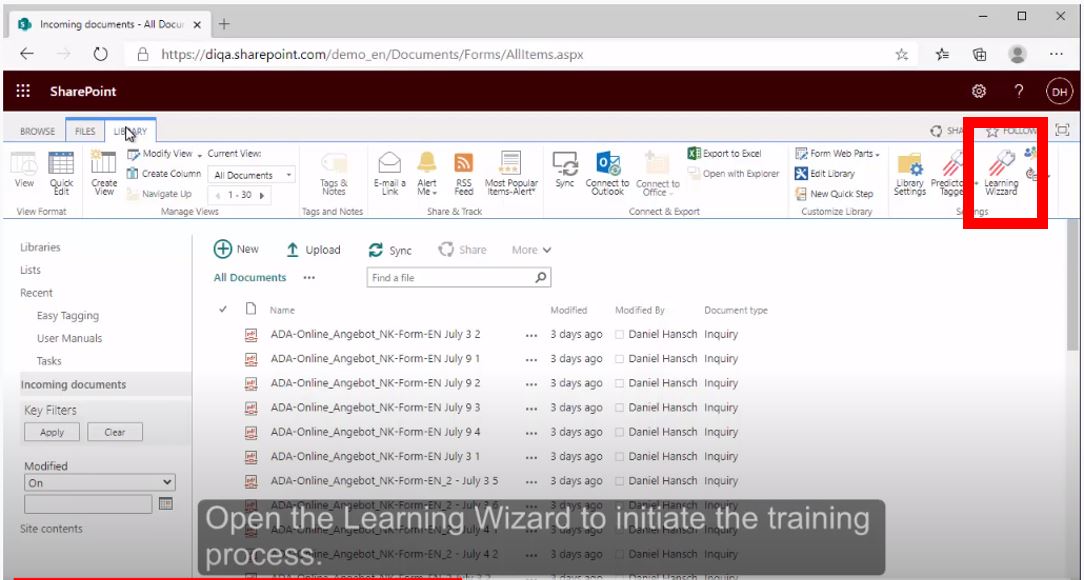
| − | # After you have created a connection to the IDAS Evaluation service you can | + | # After you have created a connection to the IDAS Evaluation service you can launch the "Learning Wizard" which will guide you through the process to learn from your examples and to tag your documents. |
| − | # | + | # Return to your library and open the "Library Settings" ribbon. |
| − | # | + | # Click on the "Learning Wizard" icon which launches the wizard in a dialog. |
| − | # | + | # Go through the three steps: |
| − | # | + | ## Click on "Click to start the wizard" |
| − | # | + | ## Step 1: select the language that is used in most of the documents of the library. If you documents in other languages: just select english. |
| − | + | ## Step 1: in the field "Learn to predict tags from this managed metadata column": select the "document types" column that you created in the earlier steps | |
| − | # | + | ## Step 2: your library is analysed for sufficient examples. If you don't have enough examples: please add further examples before you continue with the wizard. |
| − | # | + | ## Step 3: select the column which will receive the document type tags: just keep the selection. |
| − | + | ## Step 3: click on the link "Start Learning and Tagging". | |
| − | + | # The learning and tagging processes are running in the background. | |
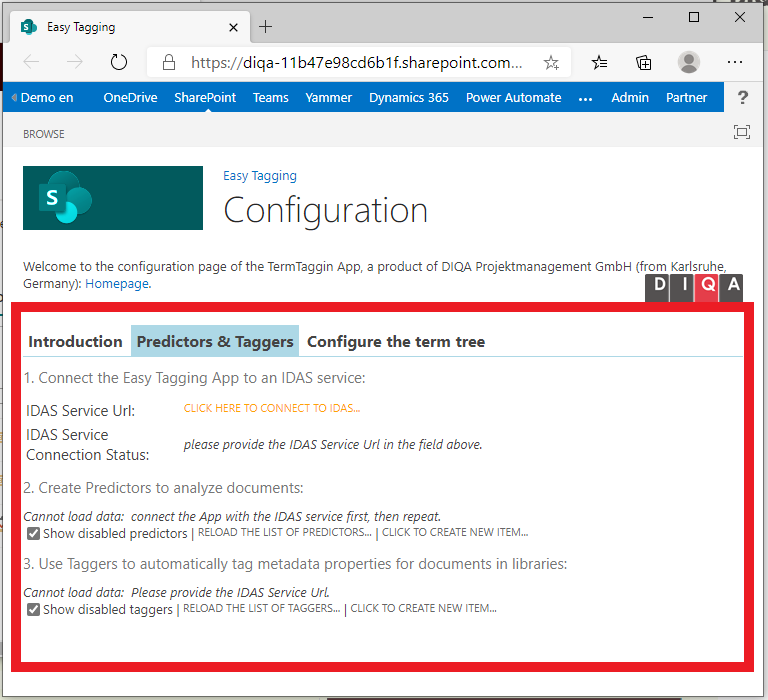
| − | # | + | # You can inspect the progress in the library ribbon "Predictors + Taggers" |
| − | |||
| − | |||
| − | |||
| − | |||
| − | |||
| − | |||
| − | |||
| − | |||
| − | |||
| − | |||
| − | |||
| − | # | ||
| − | |||
| − | |||
| − | |||
| − | |||
| − | |||
| − | |||
| − | # | ||
| − | # | ||
| − | # | ||
| − | |||
<!-- --></div> | <!-- --></div> | ||
| − | <!-- --><div class="col-md-6 col-md-border funktionen imageExpand" style="text-align: justify; >[[File: | + | <!-- --><div class="col-md-6 col-md-border funktionen imageExpand" style="text-align: justify; >[[File:Start_learning_wizard.JPG|center|middle]]</div> |
</div> | </div> | ||
<div class="row funktionen-row"> | <div class="row funktionen-row"> | ||
<!-- --><div class="col-md-6 col-md-border funktionen" style="text-align: justify; "> | <!-- --><div class="col-md-6 col-md-border funktionen" style="text-align: justify; "> | ||
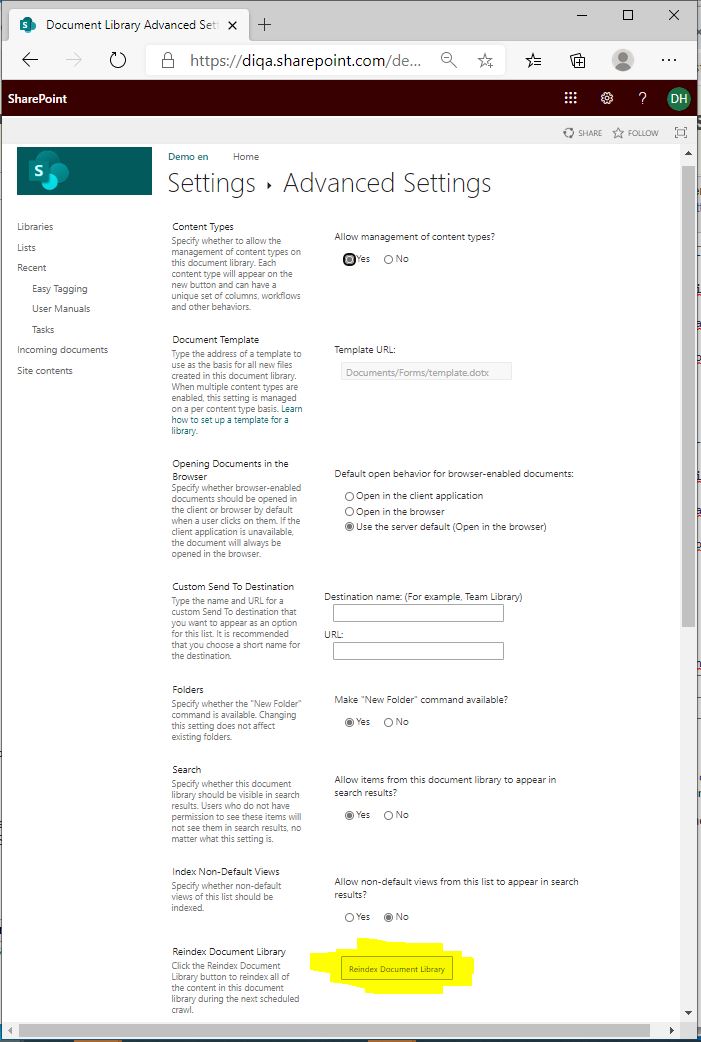
| − | === | + | === 6. Important: re-index your document library === |
# Opent the settings of your library | # Opent the settings of your library | ||
# Click on "re-index document library" | # Click on "re-index document library" | ||
| Line 252: | Line 240: | ||
</div></div> | </div></div> | ||
<div class="hideSM col-md-4 col-lg-3 col-xl-2"> | <div class="hideSM col-md-4 col-lg-3 col-xl-2"> | ||
| + | {{Linkbox | ||
| + | |color=#a0b844 | ||
| + | |heading=Watch it here: | ||
| + | |links={{#widget:YouTube | ||
| + | |width=100% | ||
| + | |height=100% | ||
| + | |id=hMaEIa2DMNs}} | ||
| + | }} | ||
{{Linkbox | {{Linkbox | ||
|color=#a0b844 | |color=#a0b844 | ||
Latest revision as of 15:29, 4 November 2020
O365: Boost document findability with autotagging (September 1, 2020)
Finding documents in Sharepoint online/Office 365 can be tedious. If you want to restrict your search to certain document types (like: reports, inquiries, CVs, sales orders, invoices) you either end up with too many irrelevant search hits or relevant documents don't show up because they don't include the search term. If you rely on Sharepoint's fulltext search capabilities only, then your users will be frustrated and spend too much time to find the right documents.
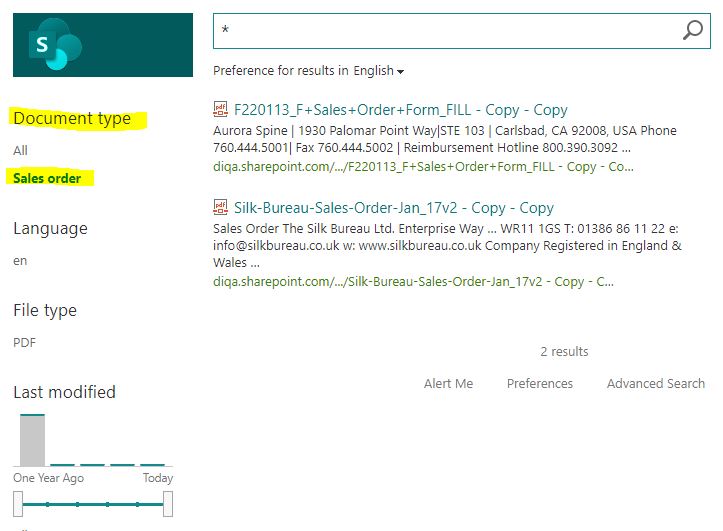
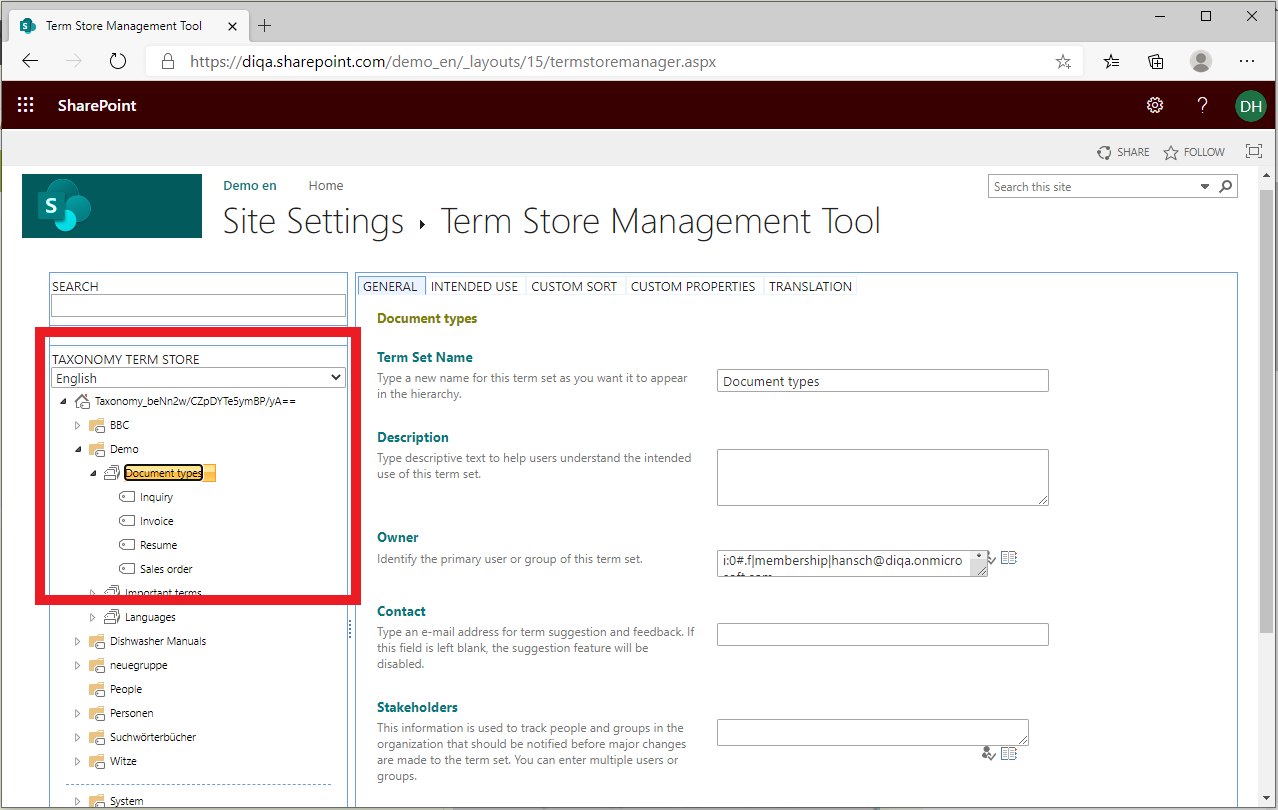
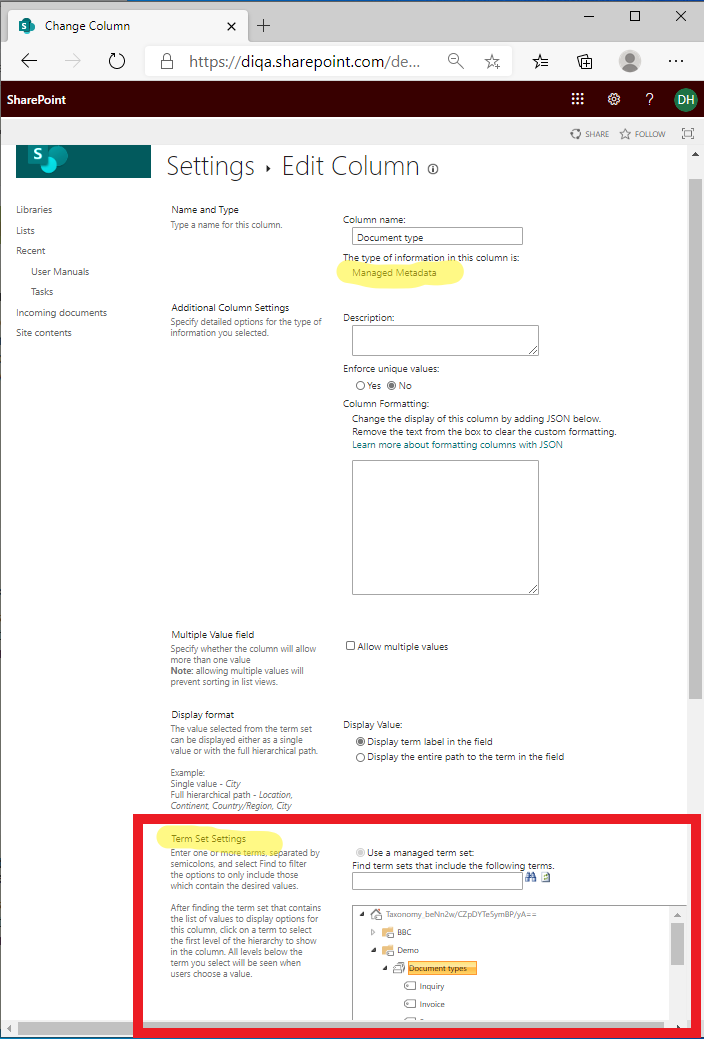
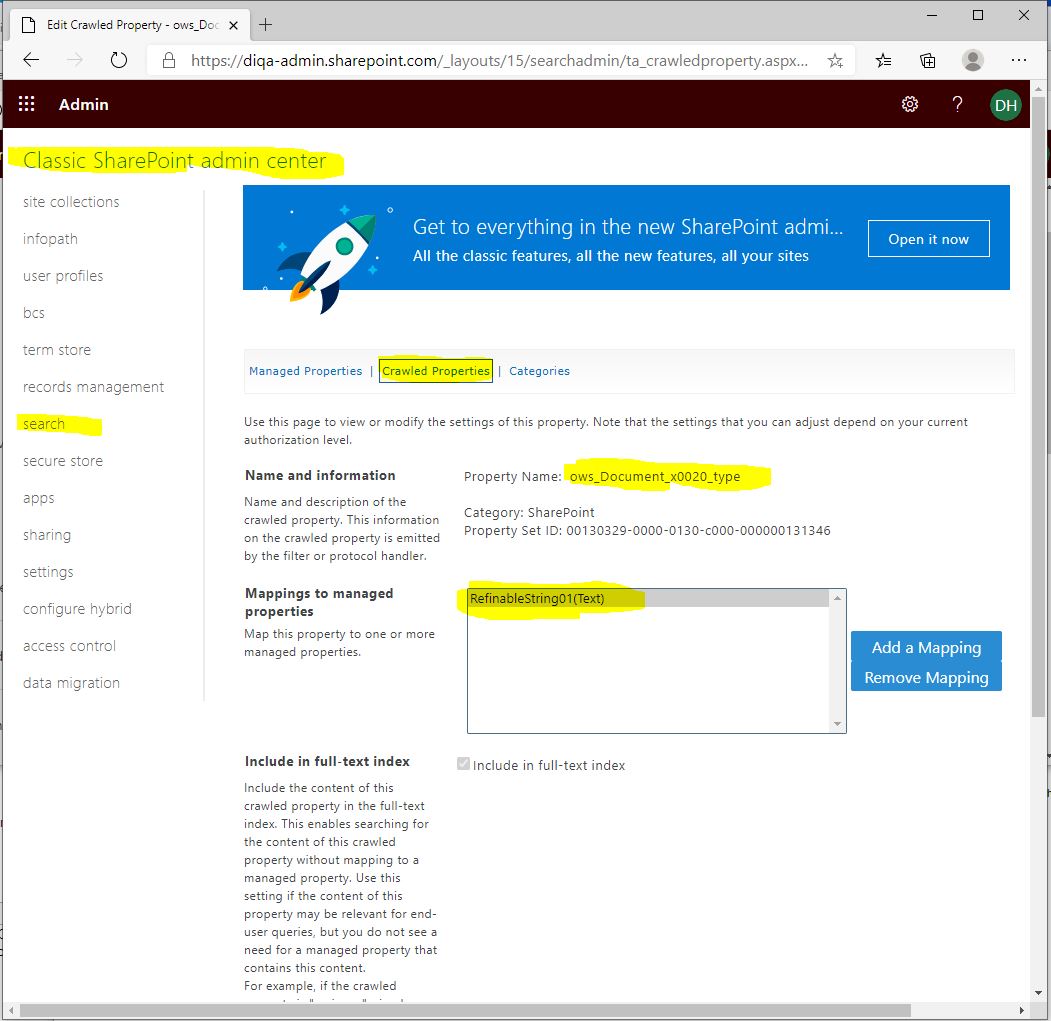
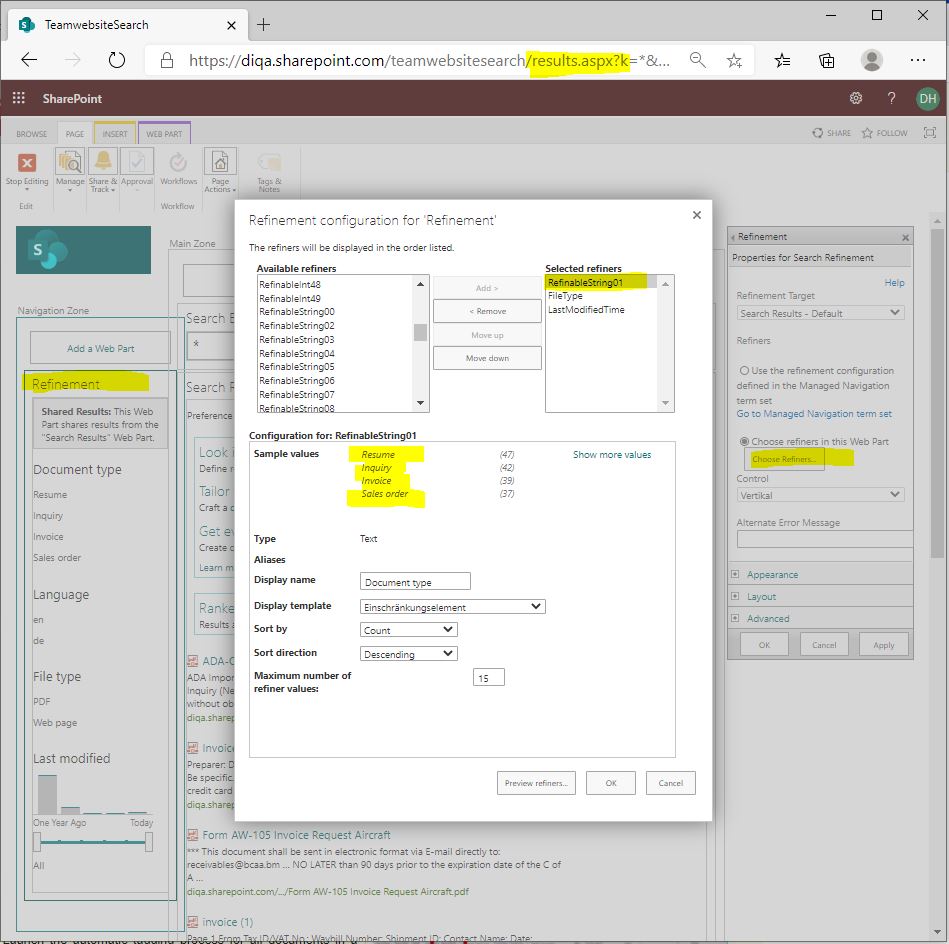
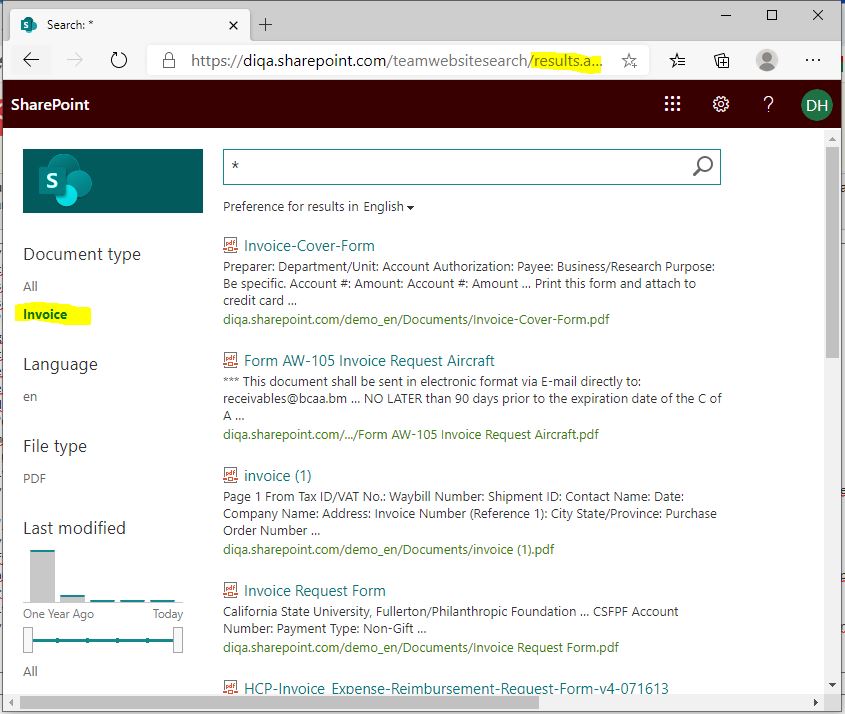
You can provide your users with a better search experience if you use search refiners. Users can further refine their search result by clicking on the refiner values, e.g. to retrieve "sales orders" or "invoices", only. Before you are able to create meaningful search refiners, you have to arrange for a couple of pre-requisites which include tagging documents with tags. This guide shows you how to automatically tag documents with their type (e.g. invoice, sales order, cv, inquiry) and how to provide search refiners that contain these document types.
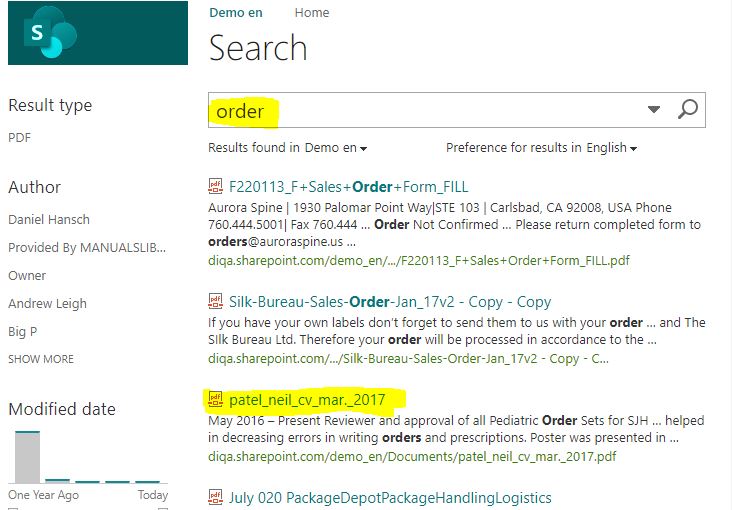
Frustrating search experience without meaningful refiners:
Entering the search term "order" returns a lot of irrelevant documents (e.g. a CV) and even misses some sales order documents.
The following steps assume that you have Sharepoint Online/Office 365 and a library that contains at least dozens of documents or scanned documents (pdf or image formats). If you are familiar with certain configuration aspects of Sharepoint then you will need 30 minutes to go them through in your tenant. If you require assistance then we are happy to help!
Watch the steps in the video:
What's next?
- Add refiners for the document language like: english, french, german, spanisch
- The Easy Tagging App has a built-in predictor that detects the language that is used in documents. You can simply use that predictor in a tagger to tag all your documents with the language. Similar to the steps in section 3 you would simply create another refiner that allows users to restrict their search results to certain languages.
- Add refiners for important words:
- The Easy Tagging App is able to identify important words from documents and store them in the termstore as a new termset. If you let the tagger tag your documents with them, then your users can use them to filter their search results.
Questions?
