Difference between revisions of "Blog/Automatically process shared inboxes in O365"
| (2 intermediate revisions by the same user not shown) | |||
| Line 3: | Line 3: | ||
|News image=File:EasyTaggingText.png | |News image=File:EasyTaggingText.png | ||
|Publication date=2021/05/10 | |Publication date=2021/05/10 | ||
| − | |Published= | + | |Published=1 |
|Keywords=sharepoint, office 365, o365 | |Keywords=sharepoint, office 365, o365 | ||
|SEO-Description=This App scans shared inboxes for new emails and forwards them to the appropriate recipient for further processing ⇒reade more! | |SEO-Description=This App scans shared inboxes for new emails and forwards them to the appropriate recipient for further processing ⇒reade more! | ||
| Line 19: | Line 19: | ||
</p> | </p> | ||
<p> | <p> | ||
| − | <big>The following steps assume that you have Sharepoint Online/Office 365 and a shared inbox that contains a couple of emails. Further you should be able to assign each email to a specific set of classes, like invoices, job applications etc.</big></p> | + | <big>The following steps assume that you have Sharepoint Online/Office 365 and a shared inbox that contains a couple of emails. Further you should be able to assign each email to a specific set of classes, like invoices, job applications etc. After you have completed these steps, your shared inbox will be scanned periodically for new emails, which will be analysed, categorized and forwarded to the recipient who is associated to the class.</big></p> |
== Watch the steps in the video: == | == Watch the steps in the video: == | ||
| Line 86: | Line 86: | ||
<div class="row funktionen-row"> | <div class="row funktionen-row"> | ||
<!-- --><div class="col-md-6 col-md-border funktionen" style="text-align: justify; "> | <!-- --><div class="col-md-6 col-md-border funktionen" style="text-align: justify; "> | ||
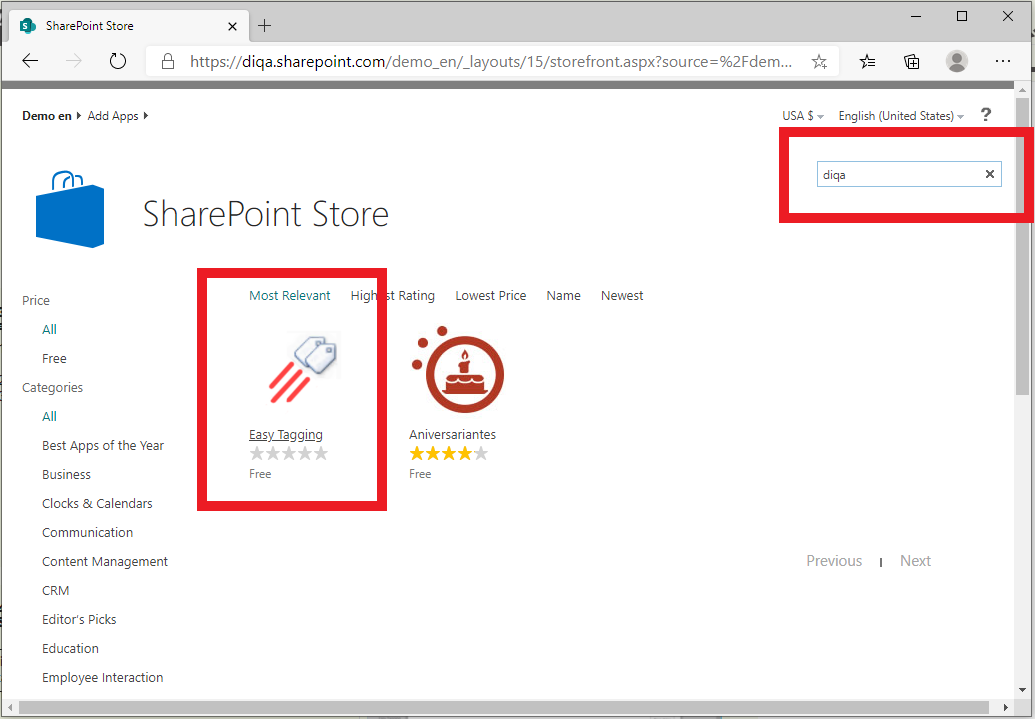
| − | === | + | === 1. Install the Easy Tagging App from the App Source (free evaluation!) === |
# Open the site settings and click on "Add an App" | # Open the site settings and click on "Add an App" | ||
# Click on "Sharepoint Store" | # Click on "Sharepoint Store" | ||
| Line 100: | Line 100: | ||
<div class="row funktionen-row"> | <div class="row funktionen-row"> | ||
<!-- --><div class="col-md-6 col-md-border funktionen" style="text-align: justify; "> | <!-- --><div class="col-md-6 col-md-border funktionen" style="text-align: justify; "> | ||
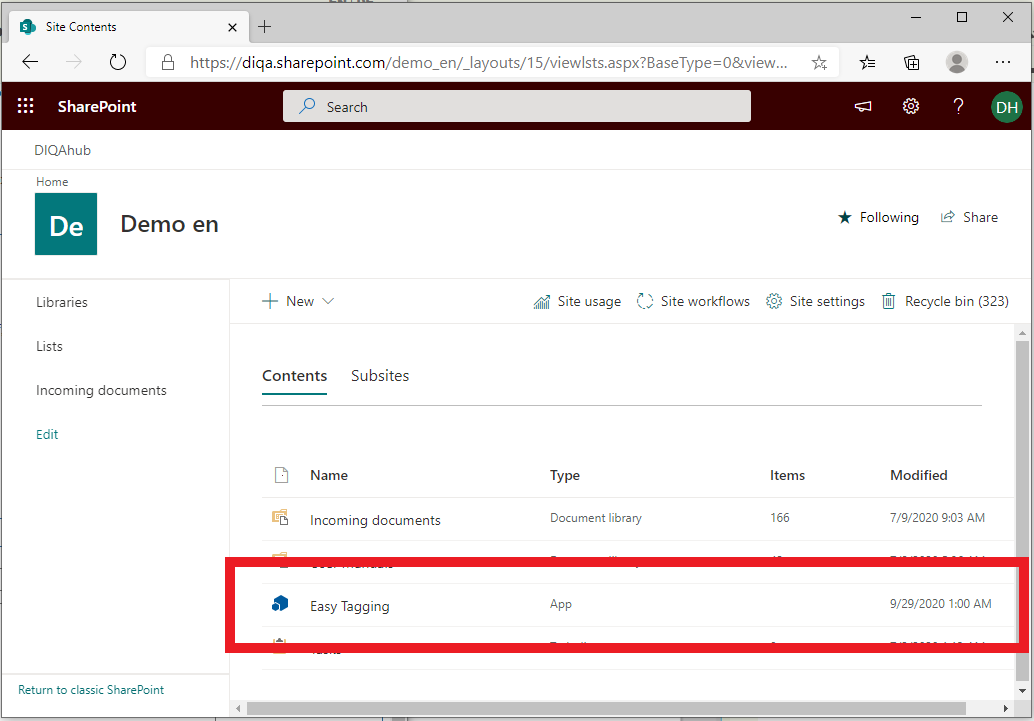
| − | === | + | === 2. Launch the app and grant it the requested permissions === |
# Open the site contents again where you should find the newly installed Easy Tagging App | # Open the site contents again where you should find the newly installed Easy Tagging App | ||
# Click on the App and grant it the requested permissions. | # Click on the App and grant it the requested permissions. | ||
| Line 109: | Line 109: | ||
<div class="row funktionen-row"> | <div class="row funktionen-row"> | ||
<!-- --><div class="col-md-6 col-md-border funktionen" style="text-align: justify; "> | <!-- --><div class="col-md-6 col-md-border funktionen" style="text-align: justify; "> | ||
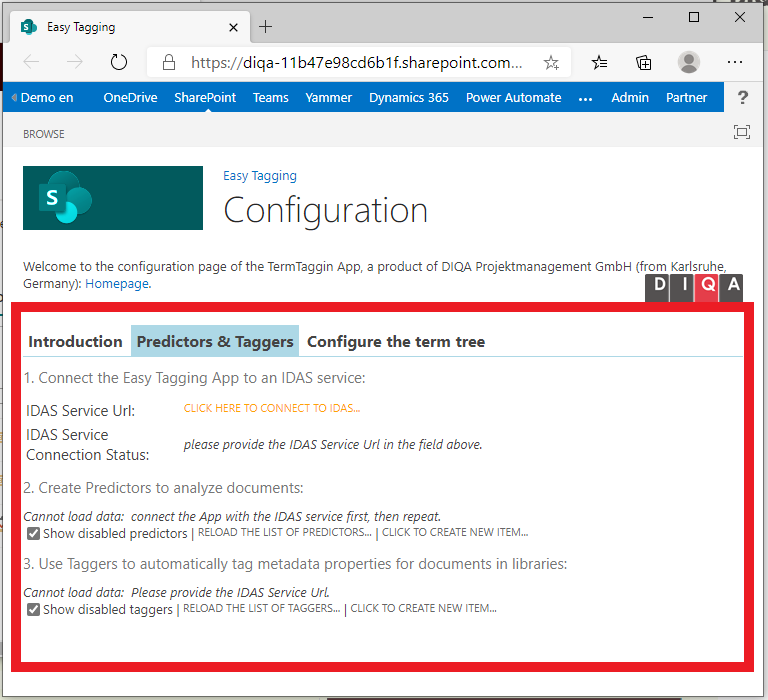
| − | === | + | === 3. Connect the Easy Tagging App with the IDAS service (1/2) === |
# In the configuration page of the Easy Tagging App: click on the "Predictors & Taggers" tab | # In the configuration page of the Easy Tagging App: click on the "Predictors & Taggers" tab | ||
# Click on the link "Click here to connect to IDAS" | # Click on the link "Click here to connect to IDAS" | ||
| Line 115: | Line 115: | ||
<!-- --><div class="col-md-6 col-md-border funktionen imageExpand" style="text-align: justify; >[[File:Apptab.png|center|middle]]</div> | <!-- --><div class="col-md-6 col-md-border funktionen imageExpand" style="text-align: justify; >[[File:Apptab.png|center|middle]]</div> | ||
</div> | </div> | ||
| − | |||
<div class="row funktionen-row"> | <div class="row funktionen-row"> | ||
<!-- --><div class="col-md-6 col-md-border funktionen" style="text-align: justify; "> | <!-- --><div class="col-md-6 col-md-border funktionen" style="text-align: justify; "> | ||
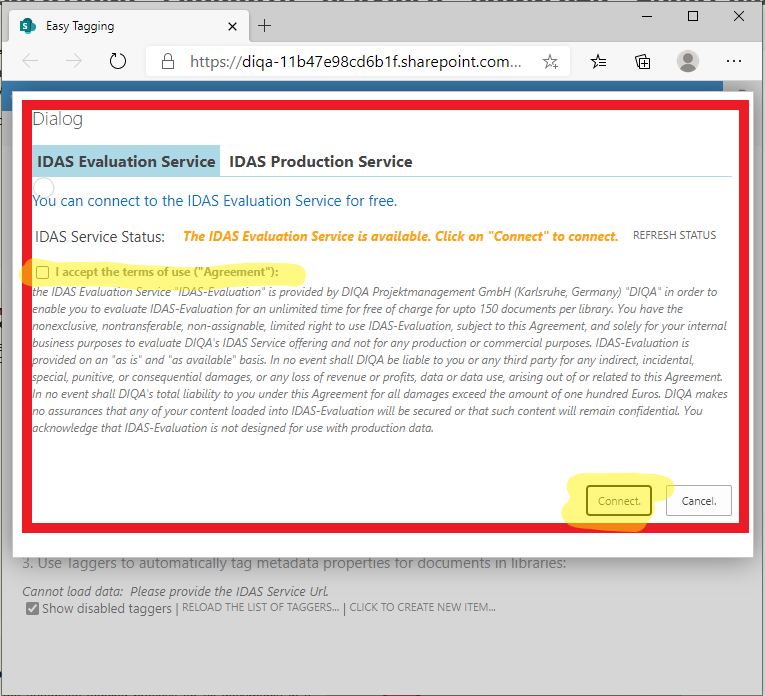
| − | === | + | === 4. Connect the Easy Tagging App with the IDAS service (2/2) === |
# In the connection dialog: select the "IDAS Evaluation Service" tab | # In the connection dialog: select the "IDAS Evaluation Service" tab | ||
# Click on "I accept the terms of use" tick box | # Click on "I accept the terms of use" tick box | ||
| Line 128: | Line 127: | ||
<div class="row funktionen-row"> | <div class="row funktionen-row"> | ||
<!-- --><div class="col-md-6 col-md-border funktionen" style="text-align: justify; "> | <!-- --><div class="col-md-6 col-md-border funktionen" style="text-align: justify; "> | ||
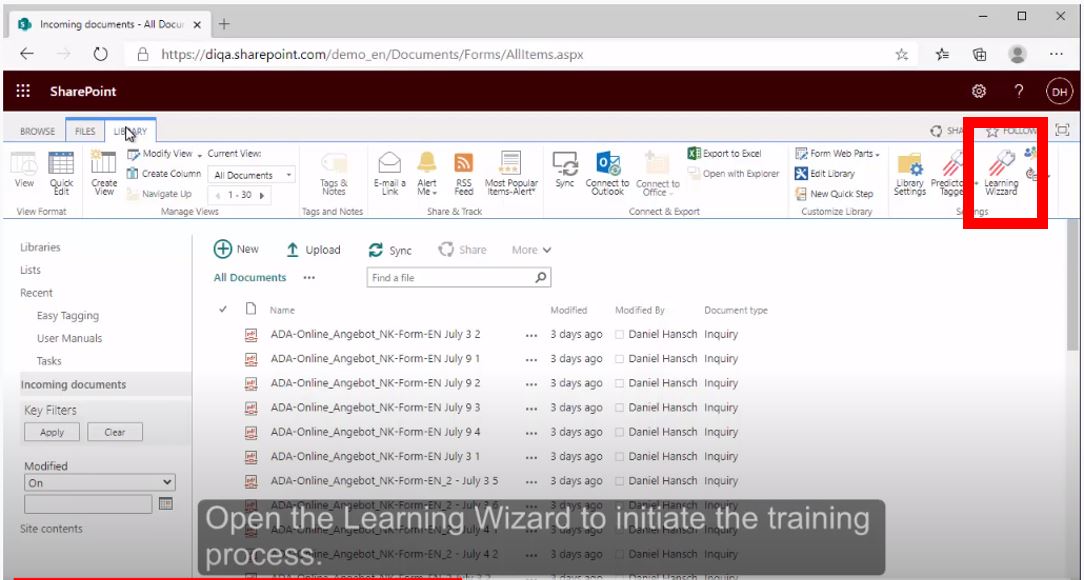
| − | === | + | === 5. Launch the "Learning Wizard" in your library === |
# After you have created a connection to the IDAS Evaluation service you can launch the "Learning Wizard" which will guide you through the process to learn from your examples and to tag your documents. | # After you have created a connection to the IDAS Evaluation service you can launch the "Learning Wizard" which will guide you through the process to learn from your examples and to tag your documents. | ||
# Return to your library and open the "Library Settings" ribbon. | # Return to your library and open the "Library Settings" ribbon. | ||
| Line 144: | Line 143: | ||
<!-- --><div class="col-md-6 col-md-border funktionen imageExpand" style="text-align: justify; >[[File:Start_learning_wizard.JPG|center|middle]]</div> | <!-- --><div class="col-md-6 col-md-border funktionen imageExpand" style="text-align: justify; >[[File:Start_learning_wizard.JPG|center|middle]]</div> | ||
</div> | </div> | ||
| − | |||
</p> | </p> | ||
</div> | </div> | ||
| Line 172: | Line 170: | ||
</p></div></div> | </p></div></div> | ||
==What's next?== | ==What's next?== | ||
| − | * | + | * Create predictors that process your document libraries automatically, e.g.: |
** The Easy Tagging App has a built-in predictor that detects the language that is used in documents. You can simply use that predictor in a tagger to tag all your documents with the language. Similar to the steps in section 3 you would simply create another refiner that allows users to restrict their search results to certain languages. | ** The Easy Tagging App has a built-in predictor that detects the language that is used in documents. You can simply use that predictor in a tagger to tag all your documents with the language. Similar to the steps in section 3 you would simply create another refiner that allows users to restrict their search results to certain languages. | ||
| − | |||
** The Easy Tagging App is able to identify important words from documents and store them in the termstore as a new termset. If you let the tagger tag your documents with them, then your users can use them to filter their search results. | ** The Easy Tagging App is able to identify important words from documents and store them in the termstore as a new termset. If you let the tagger tag your documents with them, then your users can use them to filter their search results. | ||
| Line 190: | Line 187: | ||
|width=100% | |width=100% | ||
|height=100% | |height=100% | ||
| − | |id= | + | |id=1G9apnEyH9Q}} |
}} | }} | ||
{{Linkbox | {{Linkbox | ||
Latest revision as of 17:30, 10 May 2021
Managing shared inboxes, like [email protected], or [email protected], can be errorprone and time consuming: a group of persons are scanning incoming emails from the inbox, and forwarding them to their email inbox before they reply to the customer, colleague, or other external stakeholder. This approach requires that the persons regularily go through all emails in the shared inbox, read and understand if they should reply to an specific email.
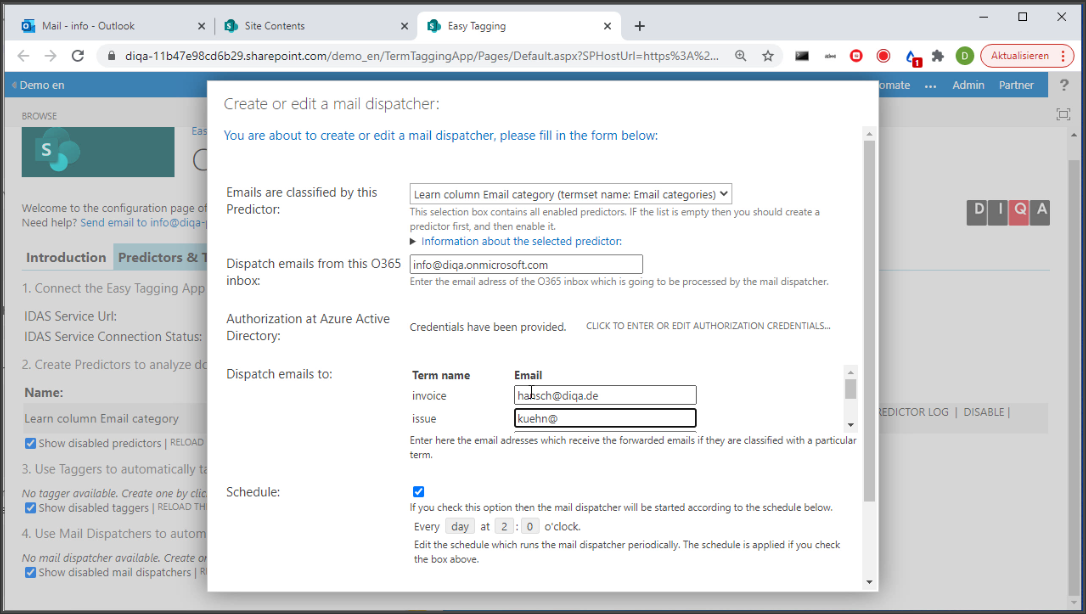
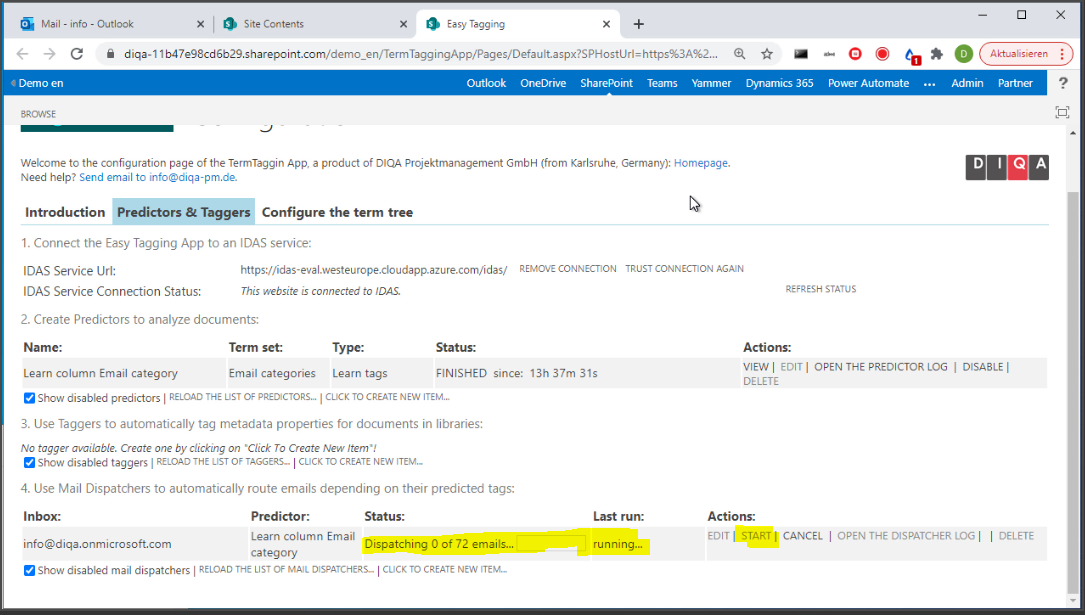
You can improve this process if you teach the Easy Tagging App to assign emails to a set of classes, like: job applications, inquiries, issues, invocies etc. In a second step, the App scans a shared inbox periodically for new emails, classifies them and forwards them to the recipient who is assigned to a class. This allows you to automate the process and each email is directed to a responsible person in a timely manner.
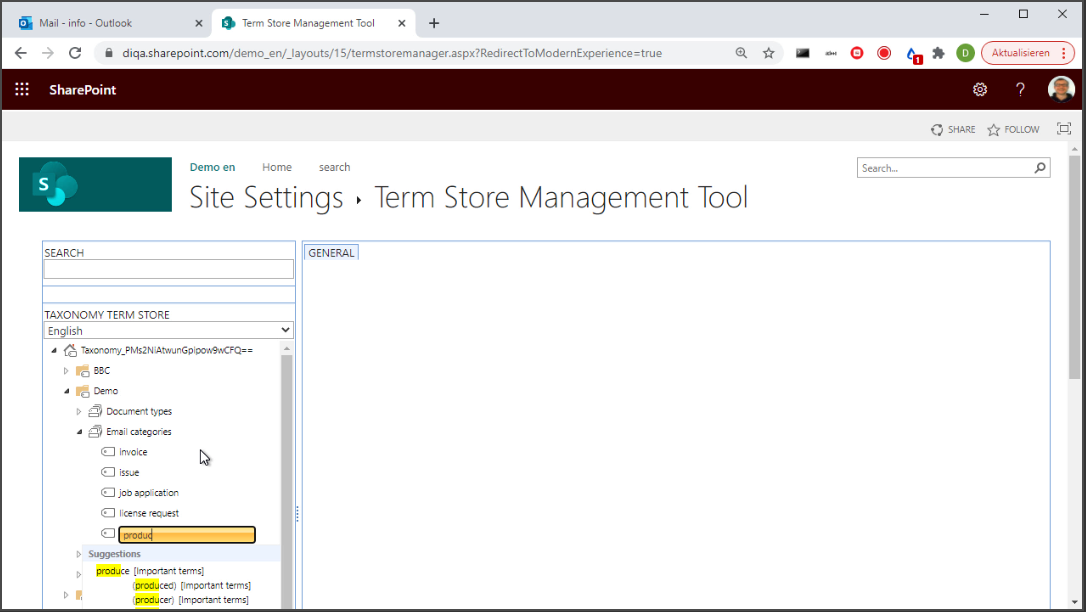
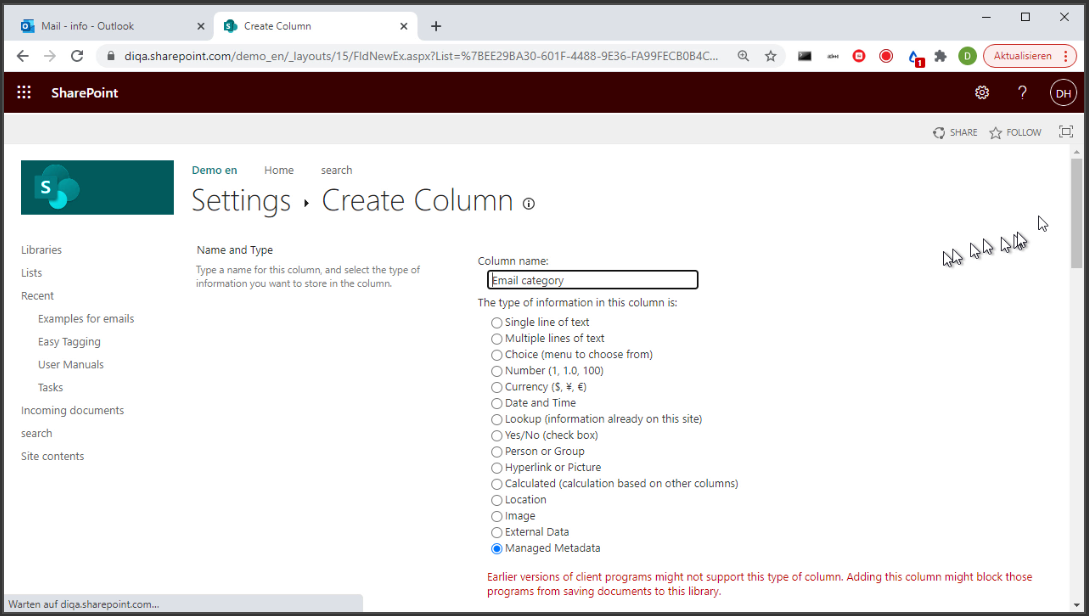
The following steps assume that you have Sharepoint Online/Office 365 and a shared inbox that contains a couple of emails. Further you should be able to assign each email to a specific set of classes, like invoices, job applications etc. After you have completed these steps, your shared inbox will be scanned periodically for new emails, which will be analysed, categorized and forwarded to the recipient who is associated to the class.
Watch the steps in the video:
What's next?
- Create predictors that process your document libraries automatically, e.g.:
- The Easy Tagging App has a built-in predictor that detects the language that is used in documents. You can simply use that predictor in a tagger to tag all your documents with the language. Similar to the steps in section 3 you would simply create another refiner that allows users to restrict their search results to certain languages.
- The Easy Tagging App is able to identify important words from documents and store them in the termstore as a new termset. If you let the tagger tag your documents with them, then your users can use them to filter their search results.
Questions?
